DIY or Pro ?
This Custom Shower can be a DIY Project for an Experience and Talented Do It Yourselfer. If you are hiring a Professional you may gain a Little Experience from this Post. You could see a Step you are not sure about, ask your Contractor. You can always contact Us if you have a Question.
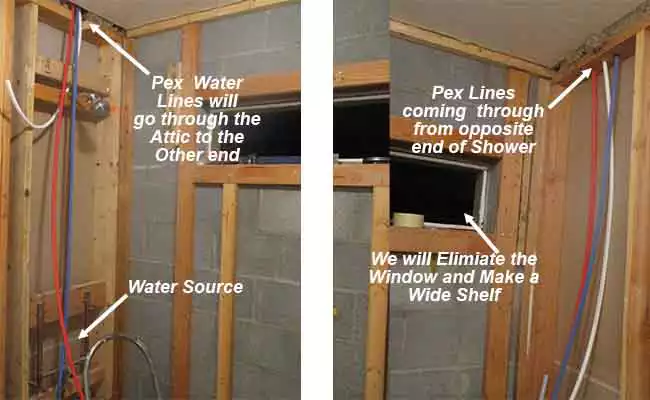
After the Demo, This Project starts with Installing New Pex Water Lines so the Mixer Valve can be Moved to the opposite end of the Shower.
Water Hammer Arrestors
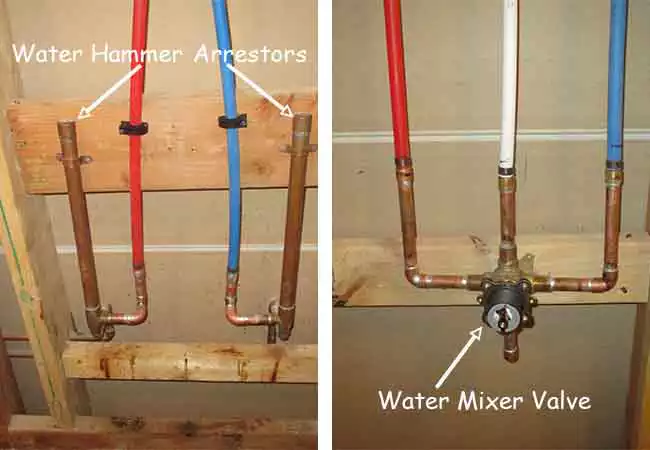
The Owner wants to keep the Water Hammer Arrestors that you see in the left Image below. They have experienced Water Hammering in the other Bathroom. Water Hammer Arrestors or Knock Reducers are a Shock Absorber so when the Water is turned Off quickly the Pipes Don't Knock. The Image also shows the Pex attached to the existing Copper Pipes, the Image on the right shows the Mixer Valve mounted at the Opposite End.
New Drain Assembly
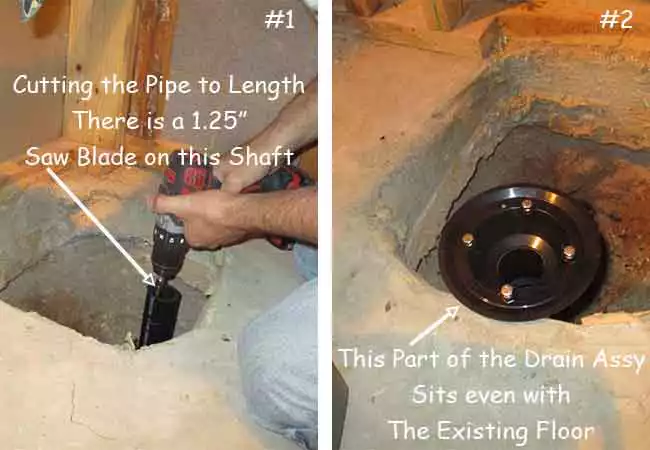
Cutting the Drain Pipe. below #1 The Image on the right, below #2 New Drain Assembly sitting on the existing floor level. An Important step, you will see in the Pre Float Image. Water above and below the Tile Floor must get out to the Drain.
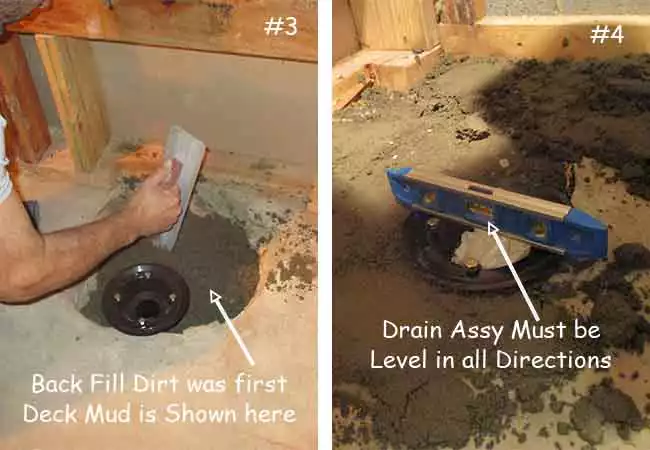
Backfill the Drain Pipe & Set Drain Assembly
After Bonding the Drain Assembly to the Pipe, Back Fill the hole with Dirt and Gravel, then finish off with (in this case) Deck Mud. As you are doing this check with a small Level to be sure the Drain Assembly is level in all Directions, adjust as needed. In a 2 Story or Basement Home you will Fasten the Pipe & Drain to the Structure.
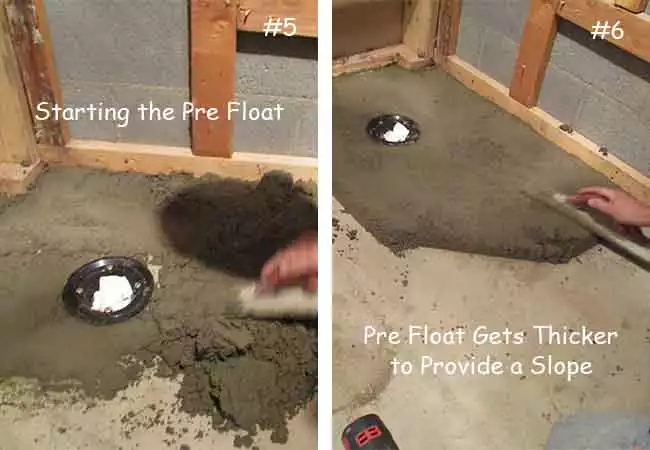
Start the Prefloat
Starting the Prefloat as Matt calls it, Matt also indicated that not all Installers include this Step (BTW this mix is a little Dry requires Packing with Trowling Tool). I asked how he knows that, He said "I have removed many leaking showers and the Deck Mud is wet, soggy and broken down because of the Moisture could not get to the Drain".
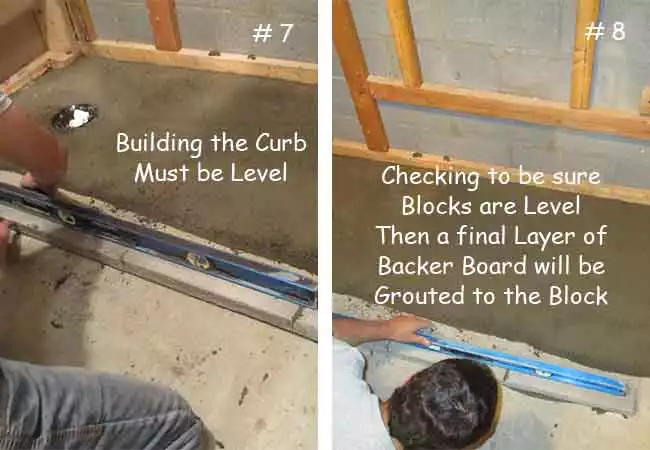
Building the Curb & Check Slope of Prefloat
The Curb, can be as high as 4", if you have a long run because of the Shower Size. This Shower gets a 2 1/2" Curb. The Blocks are Grouted to the Existing Floor, Grouted between the Blocks and Leveled.
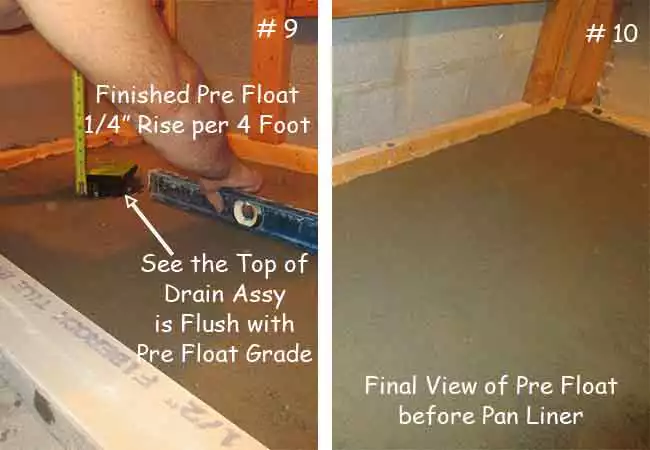
Verifying the Slope and Drain Height
The Pre Float is finished at 1/4" Slope in 4 Foot. I was impressed with the use of a 4' level that he uses just for Screeding and Slope Adjustment. I also think you have to have an eye that sees the slope. I have known this Contractor for more than 30 years, he is Extremely Meticulous when Accuracy is required.
The Pan Liner
Installing the "Pan Liner", This is an ABS Liner. The Liner is what catches all the Moisture that gets by the the Tiled Floor in the Shower. As you can see it must go up the wall for at least 6" and fastened. No cutting to make it fit. The Upper Portion of the Drain Assembly is now Fastened to the Lower Half and the Hole cut after it is Tightened down.
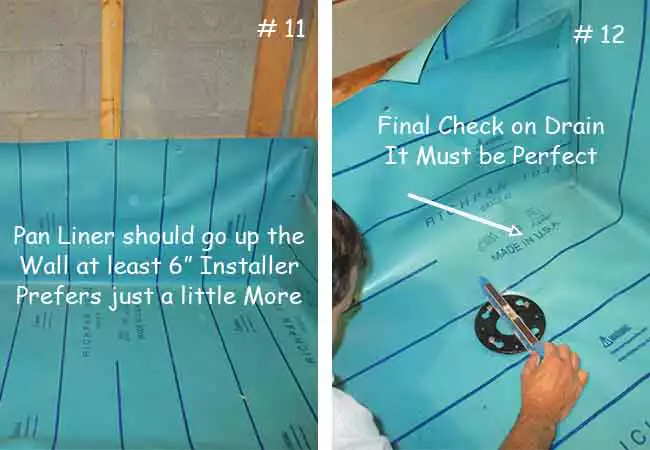
Height of Drain Cover & Backer Board
Final setting of the Drain Cover that will align with the Finished Floor Tile Height. The Green Color is the Protective Coating that will be removed after the Tile is Grouted. The Exposed Finish will be Polished Chrome. The Final layer, The Backer Board is Screwed to the Framing, on Top of the Pan Liner. The Backer Board is what the Tile is attached to. Be sure you do not run a Screw into any Pipes, Normally there would not be any Electrical in this Area but if there is be careful not to run a Screw into a Wire.
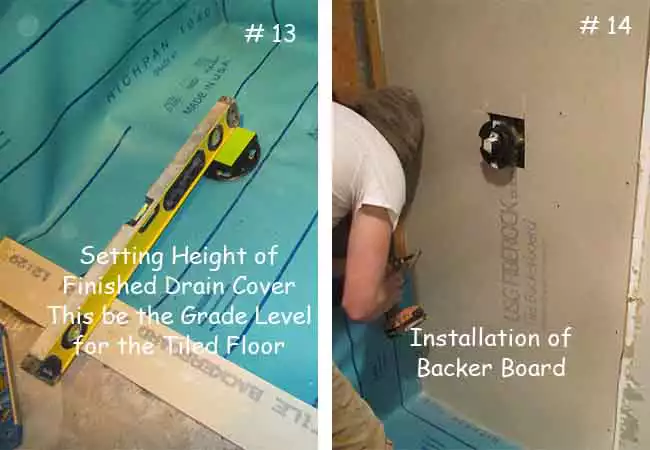
Backer Board must be Perfect
Installing the Backer Board may seem like a Mundane Task but this Board has a Job to do so Proper Alignment and Secure Fastening is a must. When the Board is Installed it must be Properly Sealed at all Joints.
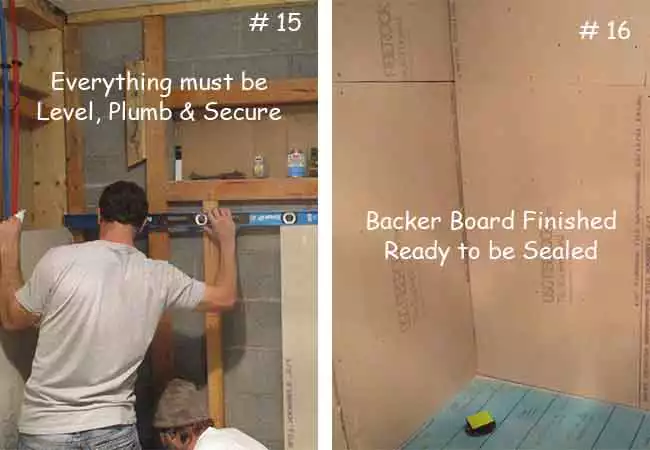
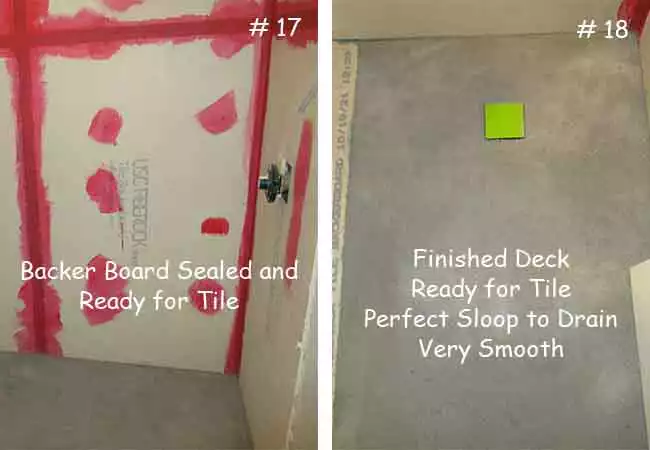
Sealing the Joints
After the Backer Board is Installed it must be Properly Sealed at all Joints. Here the Joints are Sealed and the Finished Floor is ready for Tile.
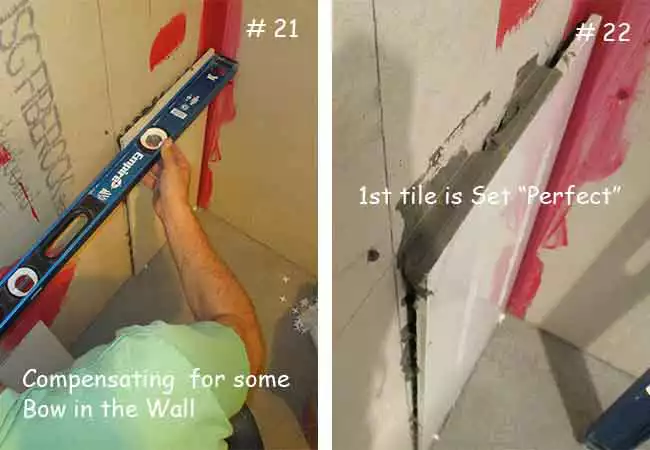
Check the Wall, is it Flat?
This Shower Wall has a slight Bow that will have to be Compensated for. That means the First Tile will need extra Thin Set to Compensate. The 1st Tile Alignment is Critical Vertically and Horizontally. As you move towards the Bow the Thin set is not as thick but must have enough to hold the Tile, this has to be considered when Placing the 1st Tile. You must also Maintain a Level Bottom Alignment from left to right while considering the 1/4" Floor Slope.

Setting the 1st Tile
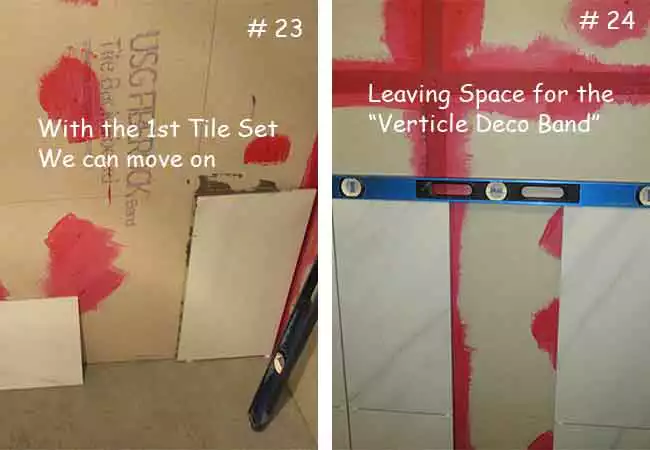
With 1st Tile Set Matt can move on. He will only be able to Set the next Vertical Row and then leave a Gap for the Vertical Deco Band or Waterfall as some call it. Matt will finish all of the 1' by 2' Tiles first them go back and install the Deco Band and the Floor Tile which is the same Tile used for the Deco Band.
Perfect Alignment
Alignment needs to be Perfect throughout. Be sure to account for a Grout Space when Figuring out the Space to leave in for the Deco Band. It should be noted that the Placement of the Deco Band took into consideration the View you will see when entering the Room. One more Tile to the Left would have made the Deco Band less Obvious.
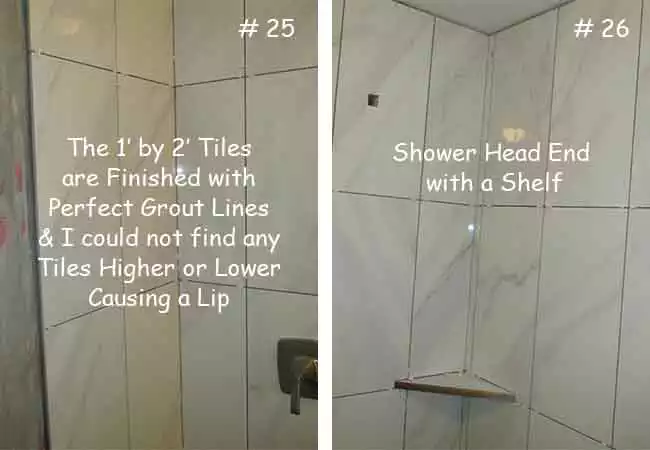
Soap Shelf, Grout Lines & Flat
All of the 1 foot by 2 foot Tiles have been Placed They installed a Corner Shelf for Soaps. The Grout Lines are all Perfect and the Tiles are all Laying Flat. The Tile is a Glossy Finish that really shows off the Shower.
The Deco Band
The Deco Band and the Floor are Finished and should be Grouted Tomorrow. I dropped the Ball when it came time to Place the Schluter Ban at each side of the Shower. This Metal Material makes a Demarcation between the Shower and the Wall Board. In the Image you can see the Parts that get buried in the Thinset and the Straight Shinny Edge is what you see.

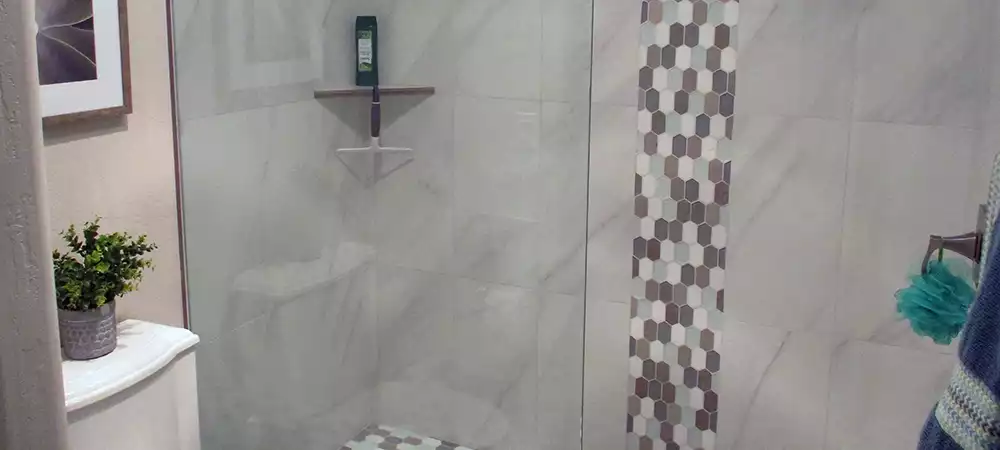
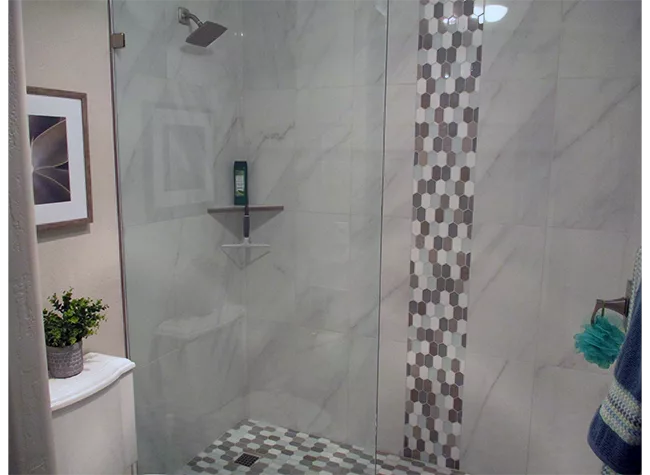
The Finished Look & No Shower Door
This Shower is Wide at 6 foot 4 inches that is how they get away with no Shower Door.
Internal Links
Like this Article, you can give us a Thumbs just click on the Icon. It's anonymous and we will Thank You.

“There is no substitute for hard work”
Thomas Edison
© Copyright 2023 YPRemodel.com. All rights Reserved. This material may not be Published, Broadcast, Rewritten or Redistributed without written Permission.